 Naasongstelugu.info World News, Live News, Trending News, Latest News, Popular News Website in India, Telugu News, Health News, Business News, Sports News, Entertainment News
Heat guns are widely used to remove paint, weld, and bend polymers. However, this helpful equipment is more adaptable than merely plastic welding tools. Surprisingly, this instrument also aids artisans in their crafting job! So, how to use a heat gun for crafts?
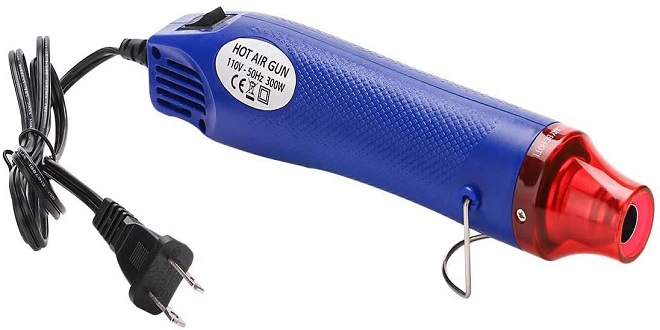
Crafting and imprinting heat guns are commonly powered by electricity and maybe securely plugged into any household power supply. These were created mainly for small craft items and delivered steady heat. These heat guns resemble miniature hairdryers, but they produce more heat with a gentler heat flow.
Let’s go deeper and uncover all of the everyday crafting usages and create suggestions that your beloved heat gun has to offer!
How to use a heat gun for crafts
You must have an embossing heat gun in your crafting toolbox if you do not already have one. With embossing inks, rubber stamps, and embossing markers, you may use a heat gun to emboss various wood materials, including chalkboards, paper, and metal.
You’ll be hooked after you try this excellent and straightforward approach! Let’s take a step-by-step look at how to utilize a heat gun!
Step1: Wipe Down with An Anti-Static Pad
Use a typical anti-pad, also called an imprinting buddy, to ready the craft material for embossing. This keeps the embossing powders from adhering to anything other than the ink. Assume you do not wish to purchase an embossing companion.
In that instance, fill a bit white sporting socks with cornmeal or talcum powder to make your own. Notably, after completing the job, you may remove any stuffing leftover by the typical anti-pad.
Step 2: Insert the Stamp
Now, insert the stamp into the embossing ink. Press the latex stamp into an engraving ink pad to cover the raised surface with ink.
Step 3: Use the Stamp on The Surface
Firmly press the painted stamp onto the surface, taking care not to smear the design. Notably, you may also use embossing pens to write or manually design a strategy onto the exterior to be embossed.
Step 4: Embossing Powder for Sprinkles
Although the ink remains wet, sprinkle embossing powders and embossed ink. This project required the use of a copper metal embossing powder.
Do this over a funnel tray or a clean piece of paper to swiftly return any fresh embossing powders to the jar. Remove any extra stamping powder from the tray by shaking it off.
Step 5: Use A Heat Applying Gun to Apply Heat
To add heat to the engraving powder, use the Low level on the heat gun. Move the heat gun in tiny circles over the surface until the stamping powder melts and transforms.
Step 6: Allow Time for Cooling
Avoid touching the heat gun’s tip since it may hurt you. To avoid burns, let the heat weapon and the engraved surface cool. You might wish to put on some heat-resistant gloves.
Step 7: Enjoy the Interior Design
After the object has cooled thoroughly, wipe away any anti-static pad residue with a lint-free cloth. Take pleasure in your embossed craft!
Crafts or Embossing Heat Gun Features
Craft heat guns can help craft artisans execute projects that require focused heat. To properly do craft operations, craft heat guns frequently have a maximum power output of fewer than 1,000 watts. They offer the following features:
- The heat gun will not burn the papers or cards.
- It features a narrow, defined airflow, ensuring that hot air is directed precisely.
- This avoids overheating other parts of the card or paper.
- The firm built them with a moderate stream of hot air to not blow the embossing powder around.
- They are intended to be turned on and off frequently for various tiny jobs.
Special DIY crafting projects to do with crafting heat gun
I regularly use several tools that I can recommend to any craftsman as a DIY er. One such tool is a heat gun. Now, find out some craft projects using the heat gun!
Creative Image
Using a dry heat gun and essential craft equipment, make paper things with ornately raised parts. Heat stamping is a technique that employs the use of rubber postage and embosses powder.
Fill an embossing ink pad with ink by squeezing a DIY rubber stamp picture onto it. Place the image on a sheet of paper and press it down. Apply embossing powders over the rubber-stamped design, then tip the paper to remove any extra powder that does not adhere to the rubber-stamped section.
Dissolve the engraving powder using the heat gun. Keep the gun about three inches away from it to avoid burning the paper. As the powder is heated, the rubber stamp area creates a lifted pattern for a creative piece with textured aesthetic appeal.
Crafty Inventive Candles
Decorate candles with beautiful paper plates for a convenient and cost-effective item. Napkins usually have an above and below the layer, so take the top surface off the napkin. Apply a glue stick to the candle’s surface and apply the paper napkin pattern.
Drag the heat gun all over the picture in a rear motion until the candle wax rises and covers the design level. Whenever the candle wax shines, the image has been enclosed.
Gorgeous Silverware
You can transform it into wall hooks by melting thin-gauge cutlery with a heat gun. Drill a hole in the tips of modern or ancient cutlery. Titanium or cobalt cutting tools are suitable for the work since they are formed of metal to facilitate drilling.
For one minute, use a heat gun to heat the cutlery in the middle of the handle. Allow it to cool somewhat.
Using only a heat-resistant clenched fist, firmly twist the cutlery into a “U” form. With a sledgehammer, attach the cutlery handle section to the wall for a functional piece that will complement any house design.
FAQs
Can you use a hairdryer as a heat gun for crafts?
Because hairdryers & heat guns perform comparable activities, anyone can use a dryer rather than a heat gun for particular purposes. You may use a dryer or perhaps a heat gun to remove labels/stickers, candle wax, and other comparable activities.
Therefore, if you’re using it frequently for this task, it will rapidly overheat and get damaged. But this isn’t the intended function of its design.
When should you use a heat gun?
Numerous versions of heat guns with varying temperatures and airflow are employed for varied purposes. You can use heat guns to shrink-wrap packages, remove paint and glue, bend and weld material, and heat stretch wrap. Electronic operations to desolder & rework electronic circuit components are also some heat gun uses.
How hot does a heat gun get?
The lowest temperature of most heat guns is roughly 100°C, as well as the highest temperature often approaches 500°C. On the other hand, some specialized heat guns can achieve temperatures of up to 700°C.
A heat gun with a temperature range of 200-400°C is sufficient for residential applications such as paint peeling. The temperature necessary for stretch wrapping differs based on the shrink-wrap. However, it is usually between 100 and 200°C.
Can a heat gun be used for resin?
A heat gun is fantastic for collecting top resin bumps, but it won’t get them at the bottom of the mold or disperse them throughout the resin. Utilizing a heat gun is merely the first step in dealing with bubbles.
If you’re using a heat gun to create cells in resin art, move the butane torch closer to the artwork surface, so the resin pushes out. The closer you bring the weapon to the area, the more the resin moves.
Final Verdict
So, we finally learned “how to use a heat gun for crafts.” Indeed, a heat gun is a crafter’s ideal tool for embossing, owing to its moderate stream of hot air that does not blast the embossing powder around.
Furthermore, the heat is focused, preventing adjacent regions from becoming overheated. To clarify, heat guns have limitless applications, especially if you’re a DIYer or crafter. You just have to be an expert and search for the best heat gun for arts and crafts.